The following is a guest post by one of our Contributing authors, and an accomplished weaver and fiber artist, Aneesha Parrone. This is the second installment about Aneesha’s work using needle felting with residents of an assisted living facility. These residents are typically senior citizens and elderly adults who suffer from Alzheimer’s disease and dementia. This article is an art therapy idea and activity she uses to help people with dementia. You can read her previous articles: Assisted Living Activities for Seniors; and Examples of Arts Activities Helping Seniors With Alzheimer’s and Dementia Remember
Needle Felting Supplies & Materials
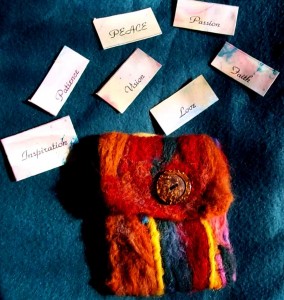
- 1’ X 3” cards with one word affirmation: i.e.: Beauty, Love, Joy (We make these with watercolors and markers. I copy and cut them and we share.)
- 6-8 colorful 1-2 oz. balls of wool roving
- felting needles, at last 3 or 4 extra in case of breakage
- bandaids
- 4 -5 inch thick foam pieces ( I usually by a large rectangle found at any fabric store and cut into 6” X 8” squares, one for each person
- 1 yard of white commercial felt from fabric store
- variety of buttons
- threaded needles
Needle Felting Instructions
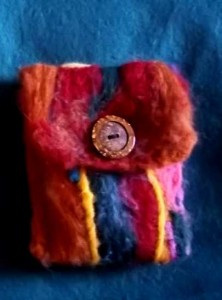
- Cut 11” X 4” rectangles from white felt. I usually do this ahead of time.
- Pull roving—Do not cut- by first pulling wool sideways and then gently pull upwards. Spread color across felt evenly, not too thickly.
- Hold wallet and begin punching the felt with the needle. Give yourself enough room so you don’t punch your fingers ~ Bandaids are on hand just in case! Completely cover one side. Felt should be tightly compacted for best results.
- Turn rectangle over and felt top 1/3.
- Fold wallet up just past the felted top 1/3.
- Felt sides closed.
- Sew button onto wallet.
- Make slit in top flap for button hole.
- Choose Joy card and place in wallet.
** In December we make pocket ornaments by using the same concept, except smaller. You can also make pencil and pen cases, eyeglass cases….whatever you need or can imagine.


Hi Aneesha,
This looks wonderful! I would love to speak with you more about this process. I’m a knitter myself but have never worked with roving wool before. I’m curious to learn how the wool works. I work with this population and I think it could be a great directive! Any insight you would be willing to share would be much appreciated. Thank you!
Caitlin
Hi Caitlin ~~ Thanks ~It has been a fantastic activity. It never gets old. The roving is so wonderful because it comes in so many many colors! Several things I have to keep in mind when doing this activity….never cut the roving…The fibers mesh together much better when the roving is pulled apart by hand. Also, when pulling the fiber, grab about midway across the top of the roving. with the other hand, grab from the bottom on the opposite side. Pull gently in the opposite direction of the top hand….Everything needs to be done gently so it will work easily. The fibers are too condensed and strong to pull apart by placing the hands directly in alignment with each other. That is something that seems to need to be practiced, as some of my friends found it too frustrating not being able to pull the roving apart. Practice and gentle guidance …as well as laughter and smiles helps a lot ~